Wholemeal trail mix loaf

Wholemeal trail mix loaf

There always comes a point in Project Pastry where I feel comfortable enough to go out on my own.

I’m never going to be one of those people who don’t rely on recipes, but once I know the basics I like to give them my own spin.

After playing around with bread recipes for the past few weeks I wanted to have a crack at my own.

This is a basic loaf recipe with bits, but I’ve added some wholemeal flour in too to go along with the healthy theme.

Wholemeal flour can be harder to work with, quite literally. To overcome this, you need to “autolyse” the dough which means that you leave it for 30 minutes before your first knead. This gives the yeast time to kick in and also allow the bran to soften.

A full wholemeal loaf is a bit beyond me at the moment, so I’ve done a combination of white and wholemeal.

I loved the walnut and honey loaf I made a few weeks ago, so wanted to do another bread with bits.

We always have a lot of trail mix in our house in an attempt to keep away from chips, and when I was searching for some raisins I thought why not use this?

My mix has a combination of dried raisins, cranberries, almonds, hazelnuts, pepita seeds and sunflower kernels.

It tasted absolutely gorgeous – probably my favourite loaf so far!

Wholemeal trail mix loaf

300g wholemeal flour
200g strong white flour
7g sachet fast-action yeast
10g salt
150g trail mix or any combination of dried fruit, nuts and seeds
375g tepid water

In a large bowl, rub together the flours, yeast and salt. Make sure you keep the yeast and the salt at separate ends of the bowl so they don’t directly touch (remember, the salt will kill the yeast).

Add the water and trail mix, then mix together until you have a wet dough. Cover and leave for 30 minutes.

Once rested, tip out onto a lightly floured surface and knead for 10 minutes or until you have a soft, stretchy dough.

Cover and rest for 1-1.5 hours, or until doubled in size.

Once rested for the second time, turn the dough out onto a lightly floured surface and shape into a batard.

Prove one last time for 1 hour or until doubled in size again.

Preheat the oven to 240C with your baking surface inside for at least 30 minutes before you intend to bake.

Turn the oven down to 210C and bake for around 35-40 minutes or until a light golden brown.

Two year blogiversary

My two-year blog anniversary passed a few weeks ago, and I’ve only just realised.

If I’m honest, I probably didn’t think I’d last this long and I have so much left to learn.

I started with pastry doughs, before moving on to cremes, cookies, cakes, confectionery, frozen desserts, plated desserts and viennoiserie.

Bread has been keeping me busy for the last couple of months but I’m trying hard not to forget anything I’ve learned along the way by still throwing in the odd “flashback” post.

The rest of this year is pretty much planned out already with lots more bread and then some celebration cakes in the lead up to Christmas.

After that, I’ve technically finished my curriculum which is bittersweet.

The exciting thing is that my husband and I have decided to take some time off and go travelling in South America, so Project Pastry will be going on the road.

Think empanadas, dulce de leche, tres leches cakes, alfajores and arroz con leche.

I also want to take some serious time to focus on chocolate, and there’s probably no better place than in Bariloche which is Argentina’s chocolate capital.

So here’s to my 106th post and the year ahead!

Sticky toffee pudding

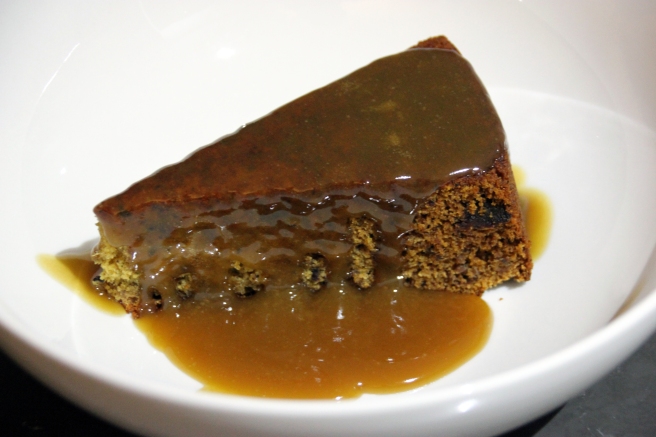
Sticky toffee pudding

It’s been very cold in Brisbane this week, and there’s not much more comforting than a serve of sticky toffee pudding smothered in butterscotch sauce.

I’ve used a Bill Granger recipe because he has a knack for perfecting classic puddings like this, lemon delicious and chocolate self-saucing.

The recipe itself is dead easy and one that you can whip up in no time.

As with most sticky toffee puddings, dates are a key ingredient and recipes will generally start with softening them in hot water before folding into a basic cake batter of flour, sugar, eggs and butter.

You can use plain flour and add the raising agent (usually bicarbonate soda) to the date mix and baking powder to the batter, or skip this step and just use self-raising flour.

For extra texture and flavour, you can add nuts such as walnuts or pecans and also add extra spices such as ground cloves or cinnamon.

This recipe makes a round cake, but you could just as easily make individual puddings in dariole moulds and adjusting the cooking time.

While the pudding is perfectly delicious on its own or served with cream, for me it needs to be drowned in butterscotch sauce made from sugar, butter and cream.

Sticky toffee pudding with butterscotch sauce (Bill Granger)

300g dates, pitted and chopped
1 tsp bicarb soda
70g diced unsalted butter
170g caster sugar
1 tsp vanilla extract
2 lightly beaten eggs
185g self-raising flour, sifted

Butterscotch sauce
185g soft brown sugar
200mL cream
150g unsalted butter, extra

Preheat oven to 180C. Grease and line the base of a 20cm round cake tin.

Put the dates in a saucepan with 250mL of water and cook, stirring occasionally for 5-6 minutes until the water has been absorbed. Remove from the heat and stir in the bicarbonate of soda and 70g of butter; set aside to cool for 10 minutes.

Transfer dates to a large mixing bowl, add the sugar, vanilla and eggs and stir well. Fold in the sifted flour until combined, then pour into the prepared tin and bake for 50 minutes (check if it’s cooked with a skewer inserted in the middle). Leave in the tin for 5 minutes, then turn out and cool on a wire rack.

Butterscotch sauce

Heat the sugar, cream and extra butter in a saucepan over a medium heat, stirring to dissolve the sugar. Bring to a simmer and cook over a low heat for 3 minutes, then pour over the sticky date cake to serve.

Roasted garlic bread

Roasted garlic bread

Sometimes when I write a bread post, it’s all about the bread. This one was about more…

Firstly, my husband is a huge garlic bread fan. For many years, it was his idea of a starter when we went out for dinner.

Secondly, I knew I was making paella for dinner so wanted something crunchy and tasty to be served on the side.

This recipe hit both notes perfectly.

It’s not your typical garlic bread recipe – rather than slathering butter, garlic and (why not?) cheese on top a traditional baguette, it infuses roasted garlic into the dough itself.

It’s a very wet dough which made it tricky to work with, especially when shaping. The recipe calls for making your own proving basket which I didn’t do – I just shaped my bread and hoped for the best.

Perhaps it didn’t rise as far as it could have, but it was delicious nonetheless.

The roasted garlic is sweet and subtle. It doesn’t smack you in the face, but certainly lingers afterwards.

It was the perfect accompaniment to my paella and a bread I will definitely make in the future.

Roasted garlic bread – James Morton

400g strong white flour
7g sachet fast-action yeast
8g salt
15g olive oil
280g tepid water
1 whole head garlic
Drizzle of olive oil

In a large bowl, mix together the flour, yeast and salt – keeping the salt and yeast at separate sides of the bowl.

Add the oil and water, and combine into a wet dough.

Knead for 10-15 minutes or until you pass the windowpane test. Cover and rest of 1-1.5 hours or until it has doubled in size.

While the dough is resting, roast the garlic at 200C for 30 minutes. Simply place the whole head of garlic in a roasting tin and drizzle with oil. Allow to cool, then squeeze out the garlic from the cloves.

Add the mushed garlic to the rested dough and fold to incorporate.

Turn out onto a floured surface, and divide into two. Shape and place into proving bowls (note, I just shaped them into boules and left to prove again).

Prove for a further hour, and start to pre-heat your oven at 240C 30 minutes before you are ready to bake.

Reduce the heat to 220C and bake the loaves for 30-35 minutes or until golden on top.

Throw a cup of water on to the bottom of the oven for a better crust.