Soft white rolls

Soft white rolls
Soft white rolls

My husband is a huge fan of soft white rolls with peanut butter or cheese for lunch, so this post is for him.

Using milk in your dough rather than water will result in a richer bread with a more velvety texture.

It also makes a softer crust, but you can adjust your cooking method with this result to get a soft or crunchy crust.

Making a roll dough is exactly the same as making a loaf dough, but you’ll need to allow a lot more time for the shaping.

This recipe recommends rolling the dough out into a sausage shape, and then cutting off pieces of dough to then shape into rounds.

Shaping the dough
Shaping the dough

To do this you need to cup your hand, then place over the piece of dough and move it round and round in circles until you have a tight, even, round ball.
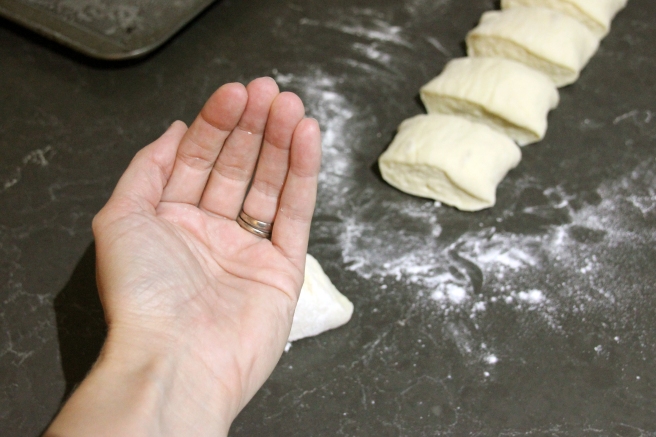
Cupping your hand to roll the dough

I’ve seen people do this with both hands at the same time, but I’m definitely too uncoordinated to try that just yet!
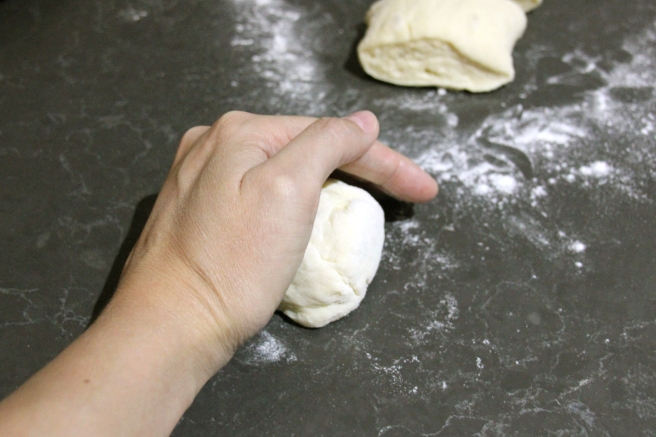
Rolling the dough
Rolling the dough

I also learned two other things from this recipe:

  • I prefer to go with a kneaded method when making bread. This is a non-knead recipe which is supposed to be easier, but I found the length of time it took to proof multiple times frustrating. I also didn’t achieve quite the rise and airiness I was looking for.
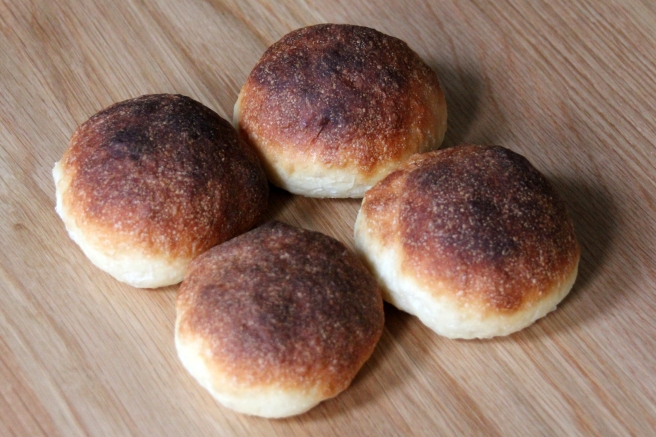
  • Milk-based rolls brown quicker because of their sugar content, so these came out a bit darker than I’d hoped but still tasted great.

Soft white rolls (from James Morton)

500g strong white flour
20g caster sugar
10g salt
1 x 7g sachet dried yeast
330g milk at room temperature

In a large bowl, mix together the flour and sugar. With your fingers, rub in the salt at one edge of the bowl and the yeast into the other end.

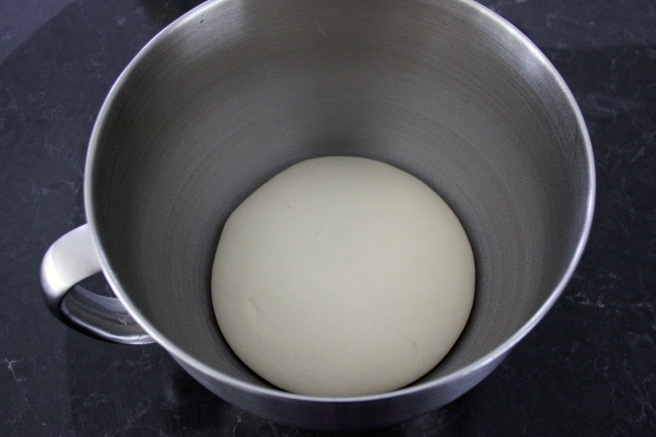
Add the milk and mix together until it forms a dough. Cover the bowl with cling film and leave to rest in a warm place for 30-40 minutes.

Wet your fingers and slide your fingertips between the bowl and the dough, then fold the dough in half. Turn the bowl a quarter turn, and repeat until you have removed all of the air and it is noticeably smoother. Cover your bowl again, and rest the dough for an hour.

Scrape the dough out onto a lightly floured surface an using floured hands, roll it out into a sausage shape. Cut the sausage in half and half again. Keep dividing until you have 12 rough pieces of dough.

Shape the pieces into balls, then place on an oiled baking tray.

Prove for a final hour or until they have doubled in size, then bake in a pre-heated oven at 230C for 10-15 minutes.

Simple white loaf

Simple white loaf
Simple white loaf

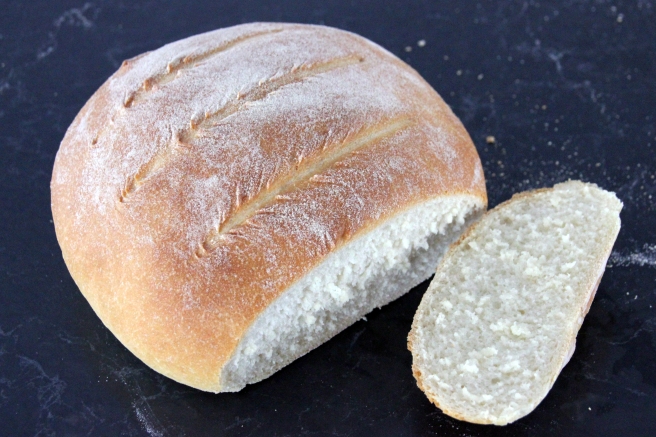
This is bread baking at its most basic, and is hopefully the start of a great journey for me.

The ingredients list is very small, so it’s really going to be all around mastering the basic techniques of bread preparation and cooking.

I’m following James Morton’s stages below:

Weighing

According to James, accurate weighing isn’t critical to bread baking. This is a massive relief compared to pastry and cake baking where it’s imperative! His advice is to always err on the side of wet dough rather than dry – his adage is “wetter is better”.

Mixing

Again, a simple step that just means bringing all ingredients together in a bowl and using your hands to create a ball that can be then turned out onto a floured surface.

Kneading

This is where it starts getting important. As I mentioned last week, gluten development is key to bread preparation because it gives the dough structure, strength and malleability.

Kneading  helps the gluten form and turn the dough from a thick tearable mass to an elastic, stretchy blob that can be shaped and manipulated.

There are several types of kneading techniques out there, but seriously it’s about getting your hands in there and moving the dough around.

Kneading a basic loaf like this one takes around 8-10 minutes and you’ll be able to see that it’s done because it will be shiny, smooth and springy.

The windowpane test is used often to tell if bread is kneaded enough. You simply need to take a small ball of dough, let it rest on your hand for a second and then try to stretch it out with your fingers. If you can create a translucent sheet without the dough tearing, you’re ready to go.

Resting

Sounds easy, but knowing how long to let bread prove is another tricky thing. The first prove should take around an hour and your dough should double in size. This is a very vague rule of thumb, and something that I think will come with experience.

Before proofing
Before proofing
After proofing
After proofing

Shaping

Before your second prove, you need to “knock back” the rested dough and then cut and form it into your desired shape.

The dough will be very springy by now, so easy to move and manipulate.  For this simple loaf, I’ve created a “boule” which is French for ball. There are so many shapes out there to choose from and I’ll have a crack at them over time but to start off I’m going simple.

I also made two smaller loaves with this recipe, but you can easily do one mega loaf if you are feeding a lot of people.

Prove

Time for the second prove, which should take less time – around 40 minutes for this loaf. Cover your shaped dough with cling film sprayed with a bit of oil to stop it sticking.

You should also now have you bread placed on a baking tray covered with a light dusting of flour.

Shaped, proved and ready for the oven

Score

Right, I stuffed up a bit with this one! Apparently you can get a tool called a “lame” which is essentially a razor stuck onto a stick, but I tried to get the same effect with a sharp knife. Apparently my knives need sharpening!!

Scoring helps to control the rise of the bread so that you don’t get air bubbles bursting all over the place. Also, as the bread rises in the oven it guides it where to grow.

Baking

Finally! My only tip here is to place a large baking tray across the bottom of your oven and then throw in a small amount of water just before you close the door on your bread. This will help create steam which in turn creates a crunchy crust.

Fresh from the oven - smells great!
Fresh from the oven – smells great!

Simple white loaf

500g strong bread flour
7g packet of dry yeast
350ml tepid water
10g salt

In a large bowl, mix together all the dry ingredients – keep your salt on one side of the bowl and the yeast on the other.

Add the water, a third at a time and stir to combine. Once you have a ball of dough, turn it out onto a lightly floured surface.

Knead the dough for 8-10 minutes or until smooth and shiny.

Place in a clean, lightly oiled bowl and cover with cling film. Leave to prove until it has doubled in size.

Knock the dough back and lightly knead again. Shape into two rounds and place on a floured baking tray. Cover with oiled cling film and leave to prove until it has doubled in size again.

Place into oven pre-heated at 200C and bake for 25-40 minutes.

Test it is baked through by knock the bottom of the bread – you should hear a hollow sound.

Introduction to bread

Introduction to bread

So after nearly two years of baking blogging, I’m finally getting stuck into bread and this will be my focus for the next few months.

Even though I’ve only baked bread 3-4 times in my life, I’ve always taken great interest in it – watching TV programs like Paul Hollywood’s Bread and of course Great British Bake Off.

So I have a pretty good base understanding, but am looking to really dig deeper and get some hands on experience.

Where to start???

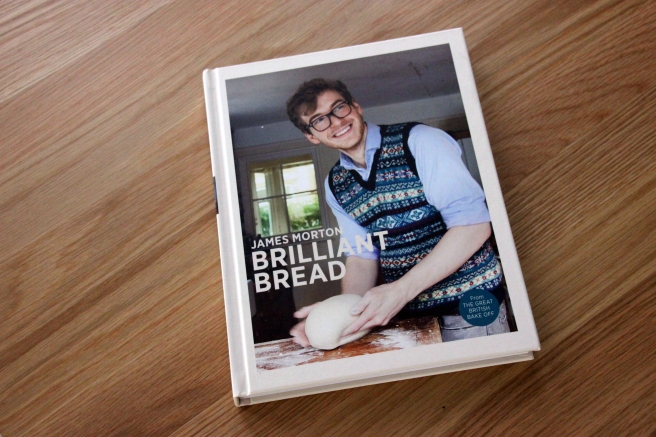
Well, firstly I wanted to flag another book that’s going to be helping me on this journey – James Morton’s Brilliant Bread. You might recognise him from Great British Bake Off a few years ago where he came runner up to John Whaites.

James Morton's Brilliant Bread
James Morton’s Brilliant Bread

I was given this book two years ago and love his simple, no-nonsense approach. He’s so enthusiastic about bread that he just cuts all the crap and talk in lay terms which really appeals to me.

So, to start off let’s look at the core ingredients of bread:

  • Yeast – we all know that yeast makes bread rise, but I’m fascinated by the fact that yeast is a living organism that feeds (on flour and water), breathes (air) and grows. Just keep it away from salt because it will kill the yeast pretty quickly.
  • Flour – you should ideally go for strong flour wherever possible, because it will help the gluten develop more easily. To take a step back, unlike when making tart doughs where you handle flour as little as possible to keep the dough short, with bread you want to gluten well-developed which is essentially where kneading comes into play. I’ll get into using wholemeal flour and rye later down the track.
  • Water – the quantity of water you use will affect the texture of the bread but more on that later. Also ensure the water is always tepid or at the temperature that you are resting the dough in.
  • Salt – used as a flavour enhancer and preservative in bread, but as pointed out above keep it away from your yeast!

Now that we know what goes in bread, how do you prepare it?

Michel Suas talks about 10 steps to bread making:

  1. Pre-fermentation (optional)
  2. Mixing
  3. First fermentation (aka first prove)
  4. Dividing
  5. Pre-shaping
  6. Resting (aka second prove)
  7. Shaping
  8. Final proofing
  9. Baking
  10. Cooking

James Morton’s process is a bit simpler:

  1. Weigh
  2. Mix
  3. Knead
  4. Rest
  5. Shape
  6. Prove
  7. Score
  8. Bake

It makes it sound like a very long, onerous process but as James points out you are not required in the kitchen very much. Most of the long stages are when the bread is resting, which means you can go out and focus on other things.

Enough background, it’s time to get baking!

Tiramisu

Tiramisu
Tiramisu

Translated from Italian as “pick me up”, tiramisu is an incredibly simple and delicious dessert that never fails to impress.

When I say simple, I mean it – this is probably one of the easiest recipes I’ve ever done on Project Pastry because essentially there is no baking involved!

Yes, I could have baked the sponge fingers and plan to one day. But I wanted to show just how a bit of mixing and assembly can produce a tasty and striking dish.

But before feeling like a total cheat, it’s worth mentioning that the recipe does involve making a sabayon which is a classic dessert in its own right – egg yolks, alcohol and sugar whisked over a saucepan of simmering water until thickened.

This in itself can be served in a champagne glass with some fresh fruit.

Back to tiramisu, there are two main things debated in a recipe:

  • Egg whites vs cream – some people are uncomfortable with including raw egg whites in desserts, but I really think it provides some much needed lightness and airiness to the mix. However, I also like the richness of the cream, so have opted for the best of both worlds!!
  • Liqueur – Marsala is traditional, but not something that everyone has in their booze cupboard. I used Havana Club rum but halved the quantity because it’s a fair bit stronger. You can basically substitute for anything you like that goes well with coffee.

Either way, this is a throw together dish so just play around and find your preferred combination.

Tiramisu

1 cup strong brewed coffee, sweetened with 2 tbsp sugar
½ cup dry Marsala wine (or ¼ cup rum)
3 eggs
1 tsp vanilla extract
3 tbsp caster sugar
250g mascarpone cheese
2 tbsps dollop cream (optional)
20 Savoiardi Italian ladyfinger biscuits
1 tbsp grated chocolate (for garnish)

Mix together the coffee, half the marsala and vanilla extract in a shallow bowl.

Separately, combine the other half of the marsala with the egg yolks and caster sugar. Whisk over a saucepan of simmering water for 5 minutes or until tripled in size.

Leave the egg yolks to cool to room temperature, then stir in the mascarpone and dollop cream.

Whisk the egg whites until you have stiff peaks, then fold into the mascarpone mix.

Dunk the biscuits in the coffee mix, then lay out across the bottom of a 6 x 9 inch dish. Spread half the mascarpone mix over the top, then layer another set of coffee-dunked biscuits.

Finally, spread across the final half of mascarpone and grate dark chocolate to garnish.

Refrigerate for at least two hours before serving.