It’s been four months since my last post and to be honest there was a moment when I wasn’t sure if I was going to return to the blog at all.
I spent the months of January-February living in Valparaiso, Chile where I enjoyed empanadas, alfajores and delicious locally baked bread. But unfortunately I had an ill-equipped kitchen so I couldn’t recreate any of these treats at home.
I then lived in Bariloche in Argentine Patagonia for the months of March-April and started studying – Spanish at the wonderful La Montana and also chocolate making through Ecole Chocolate.
My kitchen was better, but still not brilliant although was the perfect setting within which to learn how to temper chocolate and start creating my own bonbons and confectioneries.
Now, I’m living in Buenos Aires and will be here for the next couple of months. As soon as I walked into the kitchen, I knew I was going to start baking again and realised just how much I’d missed it.
I’m keen to catch up on some of the South American specialties I’ve been sampling and also share my learnings and experiences from my ongoing chocolate education.
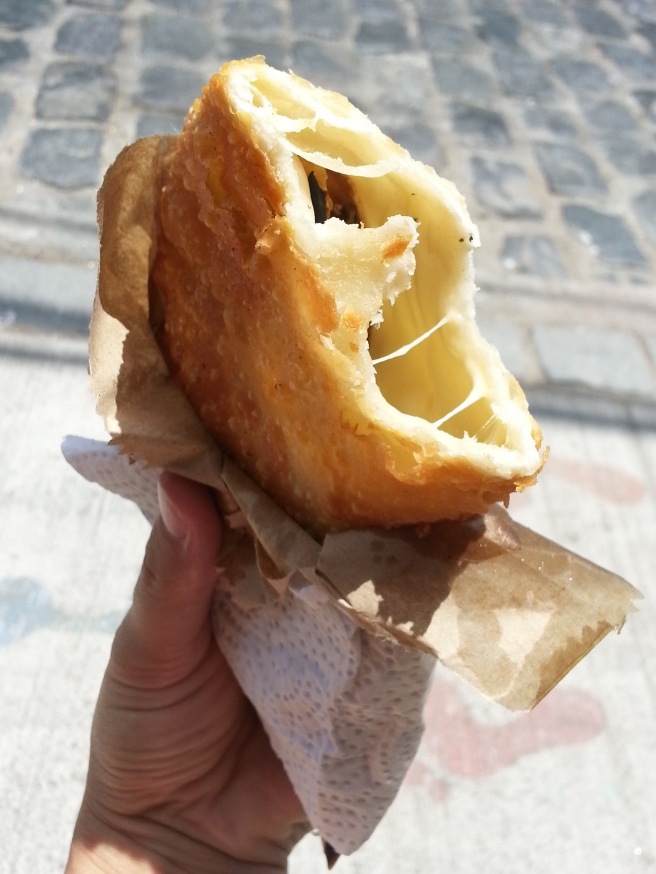
Snacking on fried cheese empanadas alongside a pisco sour.
We’ve been in Chile for nearly three weeks now, and at our home in Valparaiso for two.
I’ve been dying to get baking again, but have a few obstacles in my way – namely, a lack of gear and an oven without a temperature gauge on it.
So rather than test and develop recipes myself, I’m going to share some of the amazing foodie experiences I’ve been having and what better place to start than with empanadas.
Found all around South America, empanadas are pastry parcels either fried (frito) or oven baked (al horno) and filled with a range of delicious ingredients such as meats, cheeses, vegetables and seafood.
The Chilean speciality is pino which comprises beef, onions, raisins, black olives and hard boiled eggs.
Today we discovered a shop that sells 60 different flavour combinations! I had cheese, mushroom and olives while my husband had chicken, cheese and spinach. Both were delicious or rico as the locals would say.
Not all experiences have been so positive. We’ve had a fair few empanadas taken from a shelf and popped into the microwave to heat up so are slightly chewy and others with no filling to speak of at all.
Most doughs I’ve seen online are made up from flour, vegetable oil, egg yolk and some kind of liquid – either water, milk or stock.
Once I get settled in a fully equipped kitchen, I’ll definitely give these a go but in the meantime I’ll just have to share via photos.
Lunch on the go – fried empanada with cheese, mushroom and olives.
Right now, my house is full of packing boxes and I’ve sadly put away all of my baking kit.
However, over the weekend I had to do one last Christmas-themed bake but not something that would take up too much time.
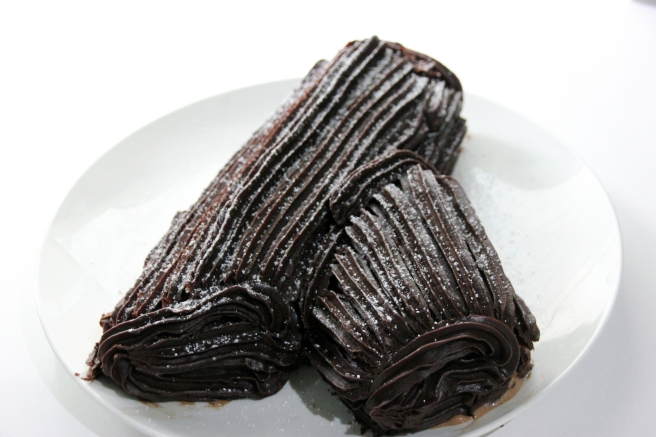
This chocolate hazelnut yule log looks very impressive but only comprises three elements – a Genoise sponge, a flavoured cream and a ganache.
The tip with a Genoise sponge, as I found out doing a shift at a local bakery, is to use your hands to mix the eggs with the flour. You can feel when it is fully incorporated, but also apply a light touch so you don’t knock the air out.
The cream is a total cheat and is made by combining whipped thickened cream, hazelnut spread (aka Nutella) and crushed almonds.
And of course, you need your chocolate ganache bark to cover the whole lot made by piping rows with a star-shaped nozzle.
Chocolate ganache 300ml thickened cream
300g dark chocolate
Preheat the oven to 200C. Lightly grease a 30 × 20cm Swiss roll tin, and line with non-stick paper or baking parchment, pushing it into the corners.
For the sponge, in a large bowl whisk the eggs and sugar using an electric hand whisk until the mixture is pale in colour, light and frothy. Sift the flour and cocoa powder into the bowl and carefully fold together, using your fingers (or a slotted spoon), until all the cocoa and flour are incorporated into the egg mixture. (Be careful not to beat any of the air out of the mixture).
Pour into the lined tin and spread evenly out into the corners. Bake in the middle of the preheated oven for 8 to 10 minutes until slightly darlkned and the sides are shrinking away from the edge of the tin.
While the cake is still warm roll so that it cools in shape and avoids cracking.
For the cream, combine whipped, thickened cream with hazelnut spread until fully combined. Pour in the chopped hazelnuts and stir until combined. I think at this stage, it’s worth placing back in the fridge to firm up a bit before constructing the log.
For the ganache, chop chocolate into small pieces so that it melts easily, place into heatproof bowl.
Heat cream in saucepan on a low-medium heat until bubbles begin to appear then remove and pour over chocolate. Whisk until really smooth and then allow to cool. Again, you may need to place back in the fridge to achieve the right consistency – it will need to be set enough to retain its structure, but not too solid that it can be piped.
Unroll the cooled sponge, and cover with a layer of hazelnut cream. Roll back tightly, then cut a third of the way down the sponge to create the log effect.
Pipe rows of ganache along the length of the log and cover the ends in circles so that the entire cake is covered.
It’s been a crazy couple of weeks, so I’m a bit behind with my posting. The main reason is because we are on the final countdown before our 9-month sabbatical and this weekend I’m going to be packing up my kitchen.
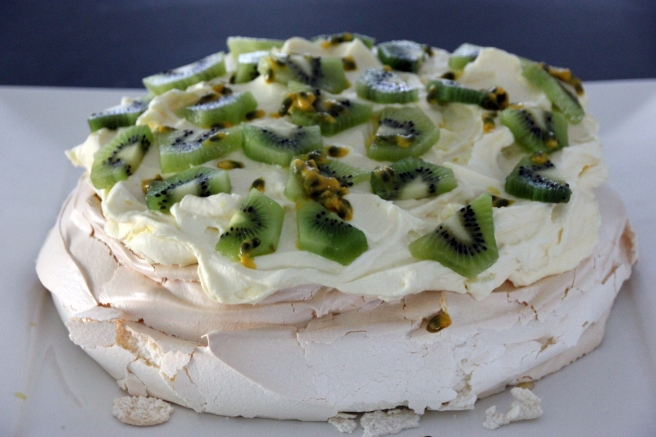
However, with family here from the UK, I couldn’t resist making a classic pavlova over the weekend.
I say classic, but this recipe from Neil Perry is anything but!
It’s not slow cooked at a low temperature as per my other recipes. It’s baked at 160C for only 1 hour whereas I’m used to 120C for 1.5 hours.
I also love this recipe because it uses both the whites for the meringue and yolks to create a passionfruit curd which is folded into the whipped cream topping.
It was absolutely delicious, but most importantly it had a great rise and crunchy shell.
Whisk eggwhites and a pinch salt in an electric mixer on low speed until they start to break up, then increase speed to medium and beat until soft peaks form (2 minutes). Add one-third of sugar and whisk to combine, then gradually add remaining sugar and whisk on high> speed until stiff peaks form (2-3 minutes). Fold through cornflour, vinegar and vanilla, then form into a 24cm-diameter round with edges slightly higher than centre on a baking tray lined with baking paper. Reduce oven to 160C and bake pavlova until lightly browned on the outside and cooked on the inside (25-35 minutes), turn oven off and stand in oven for 10 minutes, then remove and cool to room temperature (1 hour).
Meanwhile, for passionfruit curd, place yolks in a heatproof bowl, whisk to combine. Combine sugar, passionfruit pulp and butter in a saucepan over low heat, stir occasionally until butter melts and sugar dissolves (5 minutes). Add one-third of passionfruit mixture to yolks, whisking continuously, then return to pan and stir continuously until thickened (3 minutes). Do not boil. Add lime juice, remove from heat, pass through a coarse sieve into a container. Cover closely with plastic wrap, cool (10 minutes), then refrigerate until chilled (1 hour).
For vanilla cream, whisk cream, sugar and vanilla to stiff peaks in a bowl.
Fold passionfruit curd through vanilla cream, then form quenelles of mixture and spoon over pavlova. Top with extra passionfruit pulp and serve.
Note: I didn’t do the quenelles and added 2 sliced kiwi fruit.
Wednesday was my husband’s birthday and I always try to do something a bit extra special for his celebration cake.
I asked him what flavour he wanted, and received the reply “sponge-flavoured”.
I decided to try a different approach and asked him what his favourite chocolate bar was, knowing automatically that his cake would be some kind of spin on chocolate.
“Maltesers” was the reply, so I went in search of a malted chocolate cake having seen many beautifully decorated cakes online.
Mary Berry’s recipe came up top and looked delicious so I decided to go with that. However, I was a bit baffled by her reference to “Add the remaining cake ingredients and beat until smooth”.
I didn’t want to take any chances so decided to do a more traditional approach to the basic cake batter.
I beat together the sugar and butter first, then added the eggs one at a time before finally incorporating the chocolate paste and dry ingredients.
The result was fantastic, and I’ll definitely use these basic proportions for future butter-based cakes.
I used Ovaltine for the malted chocolate drink, but you could also consider Milo.
The flavoured icing was great and added to the overall Malteser experience. I covered the whole top of my cake with Maltesers so needed far more than the 20 described in Mary’s recipe.
Mary Berry’s malted chocolate cake
30g (1oz) malted chocolate drink powder
30g (1oz) cocoa powder
225g (8oz) butter, softened, plus extra for greasing
225g (8oz) caster sugar
225g (8oz) self-raising flour
1 tsp baking powder
4 eggs
FOR THE ICING
3 tbsp malted chocolate drink powder
1½ tbsp hot milk
125g (4½ oz) butter, softened
250g (9oz) icing sugar, plus extra for dusting
50g (2oz) dark chocolate (at least 50 per cent cocoa solids), melted
1 tbsp boiling water
about 20 Maltesers, to decorate
You will need two 20cm (8in) round sandwich tins. Preheat the oven to 180C/160C fan/gas 4 and grease the tins with butter and line the bases with baking paper.
Measure the malted chocolate drink powder and cocoa powder into a large bowl, pour over 2 tablespoons of water and mix to a paste. Add the remaining cake ingredients and beat until smooth.
Divide evenly between the prepared tins and bake in the oven for 20-25 minutes. Set aside in the tins to cool for 5 minutes, then turn out on to a wire rack to cool completely.
To make the icing, measure the malted chocolate drink powder into a bowl, add the hot milk and mix until smooth. Add the butter, icing sugar and melted chocolate and mix again until smooth, then add the boiling water to give a gloss to the icing.
Place one cake on a plate and spread over half the icing. Sandwich with the other cake and spread (or pipe) the remaining icing on top, using the tip of a rounded palette knife to create a swirled effect from the centre to the edge of the cake. Arrange the Maltesers over the top and dust with icing sugar before serving.
125g (4½oz) full-fat cream cheese (such as Philadelphia)
Cocoa powder, for dusting (optional)
Preheat the oven to 170°C (325°F)/gas mark 3, then line the base of the tin with baking parchment.
Pour the Guinness into a saucepan, add the butter and gently heat until it has melted. Remove the pan from the heat and stir the cocoa powder and sugar into the warm liquid. Mix together the eggs, vanilla essence and buttermilk by hand in a jug or bowl, and then add this to the mixture in the pan.
Sift together the remaining sponge ingredients into a large bowl or into the bowl of a freestanding electric mixer. Using the mixer with the paddle attachment or a hand-held electric whisk, set on a low speed, pour in the contents of the pan. Scrape down the sides of the bowl and continue to mix thoroughly until all the ingredients are incorporated.
Pour the batter into the prepared cake tin and bake for approximately 45 minutes or until the sponge bounces back when lightly pressed and a skewer inserted into the middle of the cake comes out clean. Set aside to cool, and then remove from the tin on to a wire rack, making sure the cake is cold to the touch before you frost it.
Using the electric whisk or the freestanding mixer with paddle attachment, mix the butter and icing sugar together until there are no large lumps of butter and it is fully combined with the sugar in a sandy mixture. Add the cream cheese and mix in a low speed, then increase the speed to medium and beat until the frosting is light and fluffy.
Place the cooled cake on to a plate or cake card and top generously with the cream cheese frosting. The cake can be decorated with a light dusting of cocoa powder.
Preheat oven to 180C and line cake tin with baking paper.
Cream cheese layer
Beat together the cream cheese, 1 egg, 40g caster sugar and ¼ teaspoon vanilla extract in a bowl, and place to one side.
Red velvet mixture
Beat melted butter and sugar together.
Add the following in this exact order, mixing well between each addition
vanilla extract
cocoa powder
salt
food colouring
vinegar
In a separate bowl, beat eggs with a fork and then add to mixture
Sieve in flour and gently fold through until just combined
Spread red velvet mixture into cake tin (it will be very thick) and then dollop cream cheese layer across the top. Try and keep the cream cheese away from the edges of the tin, or it will stick to the sides and be annoying to cut. Give a quick swirl with a butter knife to bring the two mixtures together, but don’t overdo it.
Bake for 25-30min at 180 degrees – cake is done when it springs back in the centre. Allow to cool in tin.
NOTE – this makes either 12 cupcakes, or one smallish cake (27 x 17cm small slice pan).
In fact, blueberries are one of the only fruits I can get my husband to eat voluntarily.
The problem is that for half the year they are prohibitively expensive – around $7 a punnet.
So I’m always chuffed when they are in season and I can start baking with them again.
One of my favourite recipes is Ina Garten’s Blueberry Crumb Cake. I have long been an admirer of Ina, aka the Barefoot Contessa, and envy her life in the Hamptons with her gorgeous husband Jeffrey.
Her whole journey from being a budget analyst to the White House, to running a beautiful café/store by the beach resonates with me (not the finance part) and I often dream about giving it all up to move somewhere beautiful and bake all day.
This recipe is essentially a butter- and sour cream-based tea cake with a few extra elements – the fruit provides extra flavour and moisture, but the streusel is the crowning glory.
This spicy, buttery mix makes your whole kitchen smell like Christmas as it bakes.
There are really no tips and tricks with the recipe, because it’s been perfect for me every time. I guess the only thing I would say is that you end up with a lot of leftover streusel, but that’s just an excuse to make a fruit crumble or some muffins to use it up.
Also, it’s a bit awkward tipping out of the tin so make sure you line your pan well and be prepared to spill some streusel all over your bench.
Ina Garten’s Blueberry Crumb Cake
For the streusel ¼ cup granulated sugar
⅓ cup light brown sugar, lightly packed
1 tsp ground cinnamon
1/8 tsp ground nutmeg
115g unsalted butter, melted1⅓ cups all-purpose flour
For the cake 6 tbsps unsalted butter, at room temperature
¾ cup granulated sugar
2 extra-large eggs, at room temperature
1 tsp pure vanilla extract
½ tsp grated lemon zest
⅔ cup sour cream
1¼ cups all-purpose flour
1 tsp baking powder
¼ tsp bicarbonate of soda
½ tsp salt
1 cup fresh blueberries
Icing sugar for sprinkling
Preheat the oven to 175C.
Butter and flour a 9-inch round baking pan. Combine the granulated sugar, brown sugar, cinnamon, and nutmeg in a bowl. Stir in the melted butter and then the flour. Mix well and set aside.
Cream the butter and sugar in the bowl of an electric mixer fitted with the paddle attachment on high speed for 4 to 5 minutes, until light. Reduce the speed to low and add the eggs 1 at a time, then add the vanilla, lemon zest, and sour cream.
In a separate bowl, sift together the flour, baking powder, baking soda, and salt. With the mixer on low speed, add the flour mixture to the batter until just combined. Fold in the blueberries and stir with a spatula to be sure the batter is completely mixed.
Spoon the batter into the prepared pan and spread it out with a knife. With your fingers,
crumble the topping evenly over the batter. Bake for 40 to 50 minutes, until a cake tester comes out clean. Cool completely and serve sprinkled with icing sugar.
I was inspired to go looking for a chocolate olive oil cake after checking out Jocelyn Hancock’s Cake and Baked Instagram account.
She is testing out recipes for her new shop, due to open next month, and I saw a picture of a chocolate olive oil bundt cake.
I’ve made cakes and muffins using vegetable oil in the past and always enjoyed the springy, light texture it creates.
But this is all about richness and density, maximising the fruity flavour of the extra virgin olive oil. If you find extra virgin too strong you could always split it 50/50 with regular olive oil.
The texture is incredibly smooth and is a nice change from the usual butter-based, flourless chocolate cakes.
Interestingly, I couldn’t find a single recipe using melted chocolate instead of cocoa powder, and I’m interested to know why – any thoughts?
This is a Matt Moran recipe and very easy to make. Plus, in my mind, it must be more healthy to use olive oil rather than butter right?? 🙂
Matt Moran’s chocolate olive oil cake
3 eggs
200g caster sugar
1 vanilla bean, seeds scraped out
150ml extra virgin olive oil
50g cocoa powder
150ml water
160g almond meal
½ teaspoon baking powder
1 pinch sea salt
Pre heat the oven to 175C.
Grease a 25cm spring cake tin and line the base and sides with baking paper.
In an electric mixer whisk together the eggs, caster sugar, vanilla and olive oil for 3 to 4 minutes or until the eggs have doubled in volume and are a little pale in colour.
In a separate bowl whisk the cocoa and water together to a make a paste, add this to the eggs along with the almond meal, baking powder and salt. Fold together and pour the batter into the prepared cake tin. Bake in the pre heated oven for about 45 minutes.
Remove from the oven and leave to cool for 20 minutes before removing from the tin.