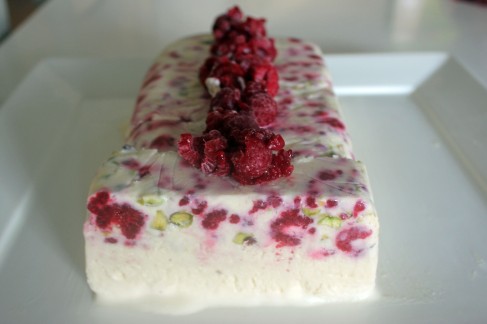
Raspberry, limoncello and pistachio semifreddo

Raspberry, limoncello and pistachio semifreddo

A semifreddo is a “still-frozen” moulded dessert which means that it doesn’t require churning like ice-cream so is simpler to prepare and doesn’t call for complicated equipment.

It translates as “half frozen” and based on a crème Anglaise custard lightened with whipped cream or meringue.

The theory is that the whipped cream or meringue lighten the custard base and create more air in the semifreddo which makes it seem less cold…hence half frozen.

And once you get the base recipe sorted, you can flavour it any way you want so it’s a very handy dessert to have up your sleeve.

I’ve seen the following combinations in my research:

  • Chocolate, hazelnut and fig
  • Toffee and macadamia
  • Mango, lime and coconut
  • White chocolate and sour cherry

Yuuuuum!

Since the purpose of this is to practice my crème Anglaise, I’ve attempted to create a recipe myself from scratch.

Raspberry, limoncello and pistachio semifreddo

6 egg yolks
500 ml milk
125g caster sugar
1 ½ cups whipping cream
1 cup raspberries (frozen or fresh)
¼ cup limoncello
1 tbsp lemon rind, finely grated
2/3 cup pistachios, roughly chopped

Make your crème Anglaise (using egg yolks, milk and caster sugar), then place in a bowl of iced water to cool. Once cooled, add the limoncellow and lemon rind.

Whip the cream, fold into the lemon custard mix. Add the pistachios and raspberries.

Pour the mixture into a loaf tin lined with cling film.

Freeze for 6 hours or overnight.

Top tip – to stop the ingredients sinking to the bottom, stir the mix gently after an hour.

The flavour was great, but there were still a fair few ice crystals and not the smooth, creamy texture I was after. Does anyone have any tips for overcoming this? I’m thinking if I make it again, I’ll reduce the quantity of milk to make the mix a bit thicker?

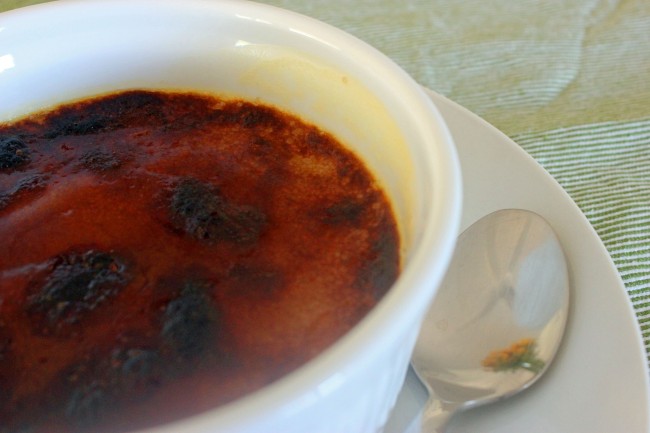
Crème brûlée

Crème brûlée
Crème brûlée

Crème brûlée is one of those classic desserts that appears on any decent bistro or French menu.

Its origin is hotly contested with France, Spain and England all claiming rights.

After a bit of research, I’ve found that the first recorded recipe was in 1691 in a cookbook by French chef Francois Massialot.

However, Trinity College in Cambridge claim the recipe for “burnt cream” was invented there and appeared on menus from the late 1800s.

Whatever its origin, the combination of rich, just-set custard with a caramelised sugar topping is now a global dish.

According to Julia Child’s recipe, a classic crème brûlée is based on a crème Anglaise but uses cream instead of milk and adds corn flour to thicken.

Her recipe isn’t baked, and as such it is a fair bit wetter than crème brûlée you might be used to.

Other recipes call for a period of baking in a low oven, with the brûlées in a bain-marie, to ensure the custard is set. I ended up cooking the custard for 35 minutes at 150 degrees after only getting a runny custard base despite setting overnight.

In terms of flavourings, you may wish to add a citrus note with passionfruit, lemon or lime, chocolate, raspberries or even coffee.

Crème brûlée (adapted from Julia Child)

4 egg yolks
5 tablespoons caster sugar
1 teaspoon corn flour
1 3/4 cups heavy whipping cream
1 vanilla bean
Demerara sugar for topping

In a sauce pan heat cream and vanilla bean until bubbly, but do not boil.

In another bowl, whisk the egg yolks and sugar until it forms a thick ribbon. Add the cornstarch and mix for a further minute.

Pour the cream into the egg mix and whisk constantly to avoid cooking to eggs.

Return to the heat and slowly cook over a low heat until the custard coats the back of a spoon.

Pour the custard into four ramekins and refrigerate for 4-6 hours or overnight to set.

Place into a baking dish and fill three-quarters up the side with cold water. Bake in the oven at 150 degrees for 35 minutes. Leave to cool.

Sprinkle the Demerara sugar over the top of the set custards and using a hand-held torch to caramelise the sugar. If you don’t have a torch, place under the grill for 2-3 minutes.

Return to fridge until ready to serve.

Top tip – I just read a note that egg proteins begin to set at 160 degrees but curdle at 180 so there’s very little room to move when thickening your custard. Try using a candy thermometer to keep an eye on the temperature if you’re worried.

Crème Anglaise

Crème Anglaise
Crème Anglaise

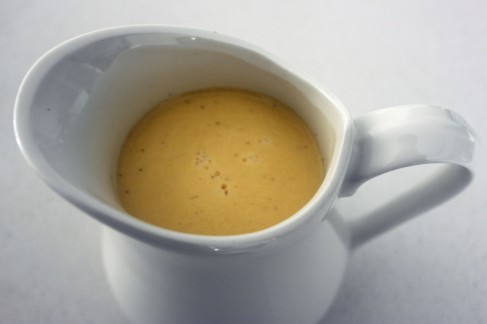
Crème Anglaise is one of the simplest recipes to learn as part of this journey, and it feels a bit like cheating devoting an entire post to it.

However, it’s the basis of so many recipes that I need to make sure I get it right. And over the coming posts I’ll be using it to make crème brûlée, floating islands, bavarois and down the track ice cream and soufflés.

Crème Anglaise is basically an English custard sauce, made by whisking together egg yolks and sugar before adding to hot milk.

The technique is relatively easy and the only way you can go wrong is when re-heating the egg-based mixture once the milk is added.

There’s a chance it will curdle and start cooking the eggs, but if you ensure the custard doesn’t actually come to the boil you should be safe.

If small blobs do start to appear, you can always sieve the custard before serving.

I will admit that the first time I made crème Anglaise, I totally stuffed it up. I saw it coat the back of the wooden spoon but kept thinking it wasn’t quite there yet and before I knew it I had scrambled eggs.

Follow Michel Roux’s recipe below and you should be safe!

Crème Anglaise
500ml milk
125g caster sugar
1 vanilla pod, split lengthways
6 egg yolks

Put the milk, two-thirds of the sugar and the vanilla pod into a heavy-based saucepan and slowly bring to the boil.

Meanwhile, whisk the egg yolks and remaining sugar together in a heatproof bowl. Continue to whisk until the mixture becomes pale and has a light ribbon consistency.

Pour the boiling milk on to the egg yolks, whisking continuously, then pour the mixture back into the saucepan.

Cook over a low heat, stirring with a wooden spatula or spoon; do not let it boil or it may curdle. The custard is ready when it has thickened slightly – just enough to lightly coat the back of the spatula. When you run your finger through, it should leave a clear trace. Immediately take the pan off the heat.

Pour through a fine sieve into a bowl set over crushed ice and leave to cool, stirring occasionally to prevent a skin from forming.

Introduction to crèmes

I’ve decided to take a break from pastry doughs and move on to crèmes. My weekly butter purchase and intake is getting a bit crazy and, I suspect, so is my cholesterol level.

That said, I can’t imagine trialing and testing cream-based desserts is going to be great for my waistline either.

There are a number of crèmes (or creams) that pastry chefs have in their arsenal, and many are the basis of classic desserts like crème brûlée and île flottante.

Most start with a basic thickened cream or milk, and then have a number of ingredients added to create a different taste or texture.

This post will just be a basic overview of the top crèmes, and then I’ll start creating some recipes over the following weeks.

Foundation creams

These creams, along with basic whipped cream, are the foundation of many advanced creams but are also frequently used in their own right.

Crème Chantilly

Crème Chantilly is simply a sweetened cream made by adding sugar or stock syrup to thickened cream. It sometimes includes vanilla for extra flavour.

Crème Anglaise

Translated as English cream, crème Anglaise could be considered more of a sauce because of its fluid consistency, and is the basis of many ice creams and mousses. It is also what is used to create a crème brûlée and the custard base of île flottante (floating islands). Its ingredients include milk (and sometimes cream), sugar and egg yolk.

Crème pâtissière

Also known as pastry cream, crème pâtissière is a cooked custard that is often used to fill éclairs, choux buns and other classic pastries. It is made using milk, sugar, egg, flour and butter and follows a classic custard method of adding heated milk to raw eggs to create a thick consistency. Butter is added at the end for flavour.

Advanced creams

These crèmes usually start with a crème Anglaise or crème pâtissière base.

Crème mousseline

Crème mousseline combines crème pâtissière and whipped, soft butter for a lighter, more delicate texture. It is often used when the cream needs to hold up when a pastry is cut, for example a mille fuille.

Crème diplomat

Crème diplomat is made by adding whipped cream and gelatin to crème pâtissière.  This creates a light, stable cream that can be used in moulds or as a pastry filling.

Crème Chiboust

Also known as crème St-Honore after the dessert it was invented for, crème Chiboust combines crème pâtissière and whipped egg whites (meringue). Gelatin is also sometimes added to provide extra stability.

Bavarois

Bavarois, Bavarian cream or Crème Bavaroise, has a crème Anglaise base with added whipped cream and gelatin. It can be served as a moulded dessert or as a filling to tarts, cakes and charlottes.

Crémeux

Cremeux is crème Anglaise thickened with butter and sometimes gelatin. It is often flavoured with fruit puree, chocolate or caramel and used as a tart filling.

Now it’s time to start testing! If anyone has any tips, please let me know!

Pâte á choux

Choux bun
Choux bun

Pâte á choux is named after the French word for cabbage due to its irregular and unusual appearance.

It’s not so much a pastry dough, but more a paste comprising milk/water, butter and flour and whole eggs.

Mastering choux pastry is essential because it is the basis of incredible classic French desserts like éclairs, profiteroles, Paris-Brest and Gâteau Saint-Honoré. Or if you’re in the mood for savoury, you can make cheesy gougères.

Choux paste itself is relatively simple, but the trick is the cooking technique to ensure you have a crisp golden shell and a hollow centre – ready for filling.

Some choux pastries have a tendency to go soggy or collapse as they cool despite looking perfect when you take them out of the oven.

Eric Lanlard has a couple of tips to help overcome this – open the oven midway through baking to let the steam out. Then, once baked and cooled, place the pastries back into the oven on a moderate heat for a few minutes to dehydrate.

Julia Child recommends piercing the pastries once they have baked, then return them to the oven (switched off) and leave them to cool with the door open for 10 minutes.

I used Julia Child’s recipe which doesn’t include any milk. This allows the pastry to be cooked at a higher temperature, but you may not get the colour and tenderness that a mixture of water and milk provides.

I also found that the high temperature meant that some of the choux buns cracked open as they rose, so next time I will try Michel Suas’ technique of staging the cooking – 175 degrees for the first 5-7 minutes and then lowering the temperature to 165 for a further 15-20 minutes.

Choux buns
Choux buns 

Ingredients
85g butter (6 tbsp) butter
1 cup water
¾ cup flour
1 tsp caster sugar
4 eggs

Method
Heat the water and butter in a pan until the butter melts.

Remove from the heat and add the flour. Beat together vigorously with a wooden spoon and then put back on the heat for a couple of minutes to cook the flour.

Take off the heat again and add the one of the eggs. Mix together until the egg is fully incorporated, then add the next egg before mixing again. Continue adding the eggs one at a time.

Use a piping bag or tablespoon to create mounds around 1 inch in diameter and ½ inch in height. On a greased tray.

Dip your finger in water, and gently press down on any peaks that may have formed to prevent burning.

Beat an egg in a small bowl, and use a pastry brush to coat each bun.

Bake in a preheated oven at 220 degrees for 20 minutes.  Remove the buns from the oven and pierce each on before returning to the turned-off oven for 10 minutes with the door open.