Rough puff pastry

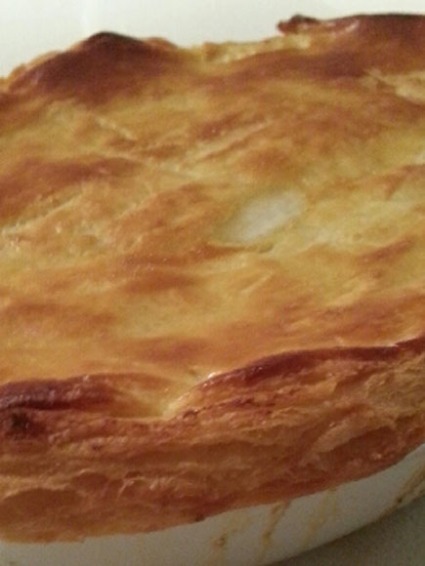
Chicken pie with rough puff pastry

I’m back on familiar ground with rough puff pastry this week.

Also known as blitz puff, rough puff is more like grandma pastry to me because it reminds me so much of the pie toppings I used to have as a child.

My grandma came out to Australia from England in the early 50s and brought with her an incredible cooking repertoire.

I’ve heard stories that she used to make a main meal and pudding every night over a single gas burner while they were building their first house.

So in her honour, I’m making a chicken pie with a rough puff pastry lid.

Rough puff is really easy to make – the perfect way to get comfortable with pastry if you’re a bit daunted.

And the result is flaky, buttery, layered pastry without too much fuss.

The formula is simple, and can be scaled up or down depending on quantity required – same quantity flour as butter, half the quantity of cold water and salt to taste.

The key is the folding and turning technique which is a much simpler version of classic puff (something I am going to have to face at some point!).

You just need to roll out the dough into a rectangle and then it fold into three. Give it a quarter turn then roll it out again before folding into three again. Repeat the process one last time and you’re ready to go.

Folding and turning technique

I do the folding and turning after I’ve refrigerated because I live in a warm climate and worry about the butter melting too much. But I’ve seen other recipes where the folding and turning is done straight away.

Ingredients
250g flour
250g butter, at room temperature
1 tbsp salt
125ml cold water

Method

Mix the flour and salt in a mixing bowl.

Cut the butter into cubes and add to the bowl.

Use your fingertips to work the butter into the flour, but stop before you get to a sandy texture.

Add the water and combine until the dough forms. Refrigerate for 20 minutes.

Complete folding and turning technique three times, then roll out for use.

Top with egg wash and cook for 20 minutes at 180 degrees or until puffed and golden.

Chocolate pastry dough

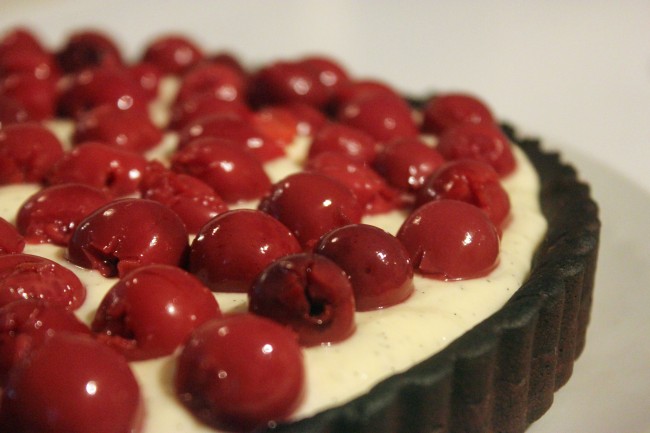
Black Forest tart
Black Forest tart using chocolate pastry dough

The inspiration for this week’s post came when I received a mini cookbook in the mail from the team at Carême.

The cookbook included a recipe for a decadent dark chocolate tart – a chocolate pastry shell filled with ganache and garnished with drunken muscatels.

One of my favourite desserts ever is Black Forest Gateaux and it got me wondering whether I could combine the rich flavours of chocolate, cherry and cream in a tart.

This led to the creation of this Black Forest tart – a chocolate pastry base filled with crème pâtissière and topped with tinned sour cherries (of which I’m a huge fan!).

To make the chocolate pastry, I used Michel Roux’s recipe for pâte sucrée and substituted a quarter of the flour for good quality unsweetened cocoa.

The rolling, resting and baking was exactly the same with this rich, dark dough but I have to say that I did have a bit of a problem realising when the pastry was ready to take out of the oven.

When cooking other tart doughs, it’s easy to tell when they are done by the golden colour and the way the base looks like it’s dried out a bit.

But this time, I couldn’t rely as much on my eyes so will admit I allowed mine to overcook a bit because I didn’t want to risk a soggy base.

The good news is that the flavour was there so the recipe wasn’t the problem – I just need to rely on touch as well as appearance in the future.

To correct my errors, I made some pastry tartlets using leftover chocolate and pâte sucrée doughs and thankfully these worked out much better.  Practice makes perfect!

I will write a post soon that sums up all of the mistakes I’ve made while learning, and how to make sure they don’t happen again!

Pastry tartlets
Tartlets

Pâte sucrée

Pâte sucrée tart with crème pâtissière

Sticking with the sweet theme (can you tell I’m a sweet tooth yet?) I have been playing around with pâte sucrée this week.

Also known as sweet short crust pastry, pâte sucrée is essentially a basic shortcrust pastry with sugar added for flavour.

Compared with last week’s post subject, pâte sablée, it is less fragile and crumbly. It also stands up well so is the perfect vehicle for delicious fillings such as crème pâtissière, chocolate ganache and lemon curd.

After reading Michel Suas’ overview of mixing methods, I decided to give the creaming method a go this time.

The pastry dough creaming method is based on the standard creaming method used with cakes and cookies.

You mix the butter (usually softened) and sugar together first before adding in the eggs and flour. But instead of creaming together until you get a pale yellow mixture (as per cakes) you do it gently to ensure not too much air is introduced.

According to Suas, you should end up with a similar result to the sanding method – when you add butter to flour/sugar and then mix together with fingertips (creating a sandy texture) before adding liquids.

The bonus is that the results are generally more consistent because the butter texture is being controlled, and also easier in a warmer climate where you don’t have to worry about everything staying cold. Definitely useful in Brisbane where it is currently 25 degrees in the middle of winter!

I think the recipe worked really well but I’m not sure that I’d include the vanilla every time, especially if you plan to add a crème pâtissière filling (as I did here) – might be overkill.

Creaming method
Creaming method

Ingredients

200g flour
100g powdered sugar
Pinch salt
100g diced butter
3 egg yolks
1 tsp vanilla extract

Method

Sift the sugar onto your work surface and make a well in the middle.

Add the slightly softened butter and mix together until fully incorporated and creamy.

Add the egg yolks and mix together with your fingertips before adding vanilla extract.

Create a second pile of flour on your work surface, and, using your plastic scraper, start incorporating bits of flour until it forms a thick paste.

Add the remainder of the flour to form a dough.

Knead out with the heel of your hand 3-4 times (aka fraisage) and refrigerate until ready to use.

Pâte sablée

Pâte sablée
Pâte sablée

I decided to jump headfirst into pastry doughs by tackling the scariest of the lot – pâte sablée.

From what I had read, this was going to be the most fragile and delicate to handle. I had been warned that it would break when I rolled it out and then burn from the high sugar content.

But in actual fact, I found it quite easy and the results were great!

Taking a step back, let’s look at what pâte sablée is and when it is used.

According to Michel Roux, the high sugar and butter content of pâte sablée makes it delicate and crumbly on the palate. It makes a perfect shell for holding fresh berries and an equally tasty and crumbly cheesecake base.

Michel Suas describes it as having a cookie-like crust and says the crumbly texture is the reason for its name – translated as sand in French.

So, to keep things simple I decided to make sablé biscuits using Michel Roux’s recipe as below:

Ingredients (makes about 650g)
250g all-purpose flour
200g butter cut into small pieces
100g confectioners (powdered) sugar, sifted
Pinch of salt
2 medium egg yolks

Method (my version)
Start by heaping the flour onto your work surface and creating a well.

Add the butter, a pinch of salt and sugar into the middle.

Using the tips of your fingers, start mixing the ingredients together gradually drawing in the rest of the flour until you have a grainy, sand-like texture.

Next add the egg yolks and combine the mixture. At this stage you might start to worry a bit because the dough seemed too dry, but slowly it will combine and become very sticky.

The fraisage process is next, helped along by the use of a plastic or metal scraper to bring the dough back together again. Push the dough out 4-5 five times with the heel of your hand, then wrap in plastic film and refrigerate for a couple of hours.

When you’re ready, roll the rested dough out to a 2-3mm thickness between greaseproof paper to prevent it sticking.

Tip – if you add too much flour during the rolling process it will affect the butter/flour ratio of the dough. Using greaseproof paper will make the dough manageable without affecting the taste or texture.

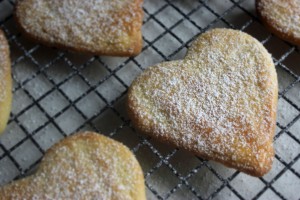
Use a cookie cutter to stamp out patterns (for me, hearts) and bake in a pre-heated oven at 170° C for 6-10 minutes depending on the their size.

Keep a close eye on them because they will burn.

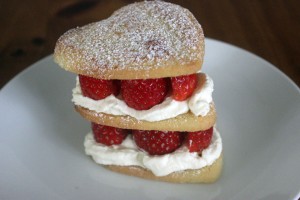
Leave them to cool on a wire rack and then decorate by sprinkling them with icing sugar or top with berries and cream.

Pâte sablée stack
Pâte sablée stack